Click Program Setup > Manage Programs.
Here is where you can manage your programs by resetting programs and updating programs based on various options.
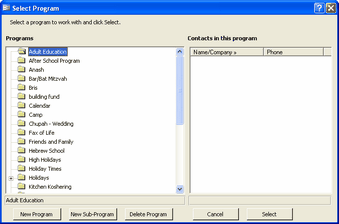
To reset a program, click on Choose Program... and select the program you want to reset by highlighting it and pressing Select. Resetting a program will cause that program to be removed from all contacts currently associated to that program. There is no way to undo this and it is strongly recommended to backup your data before resetting.
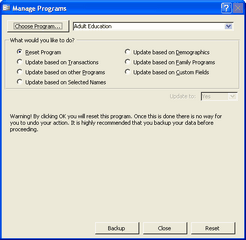
To update a program, choose how you want to update it:
Based on Transactions:
Click the radio button on the left side of Update based on Transactions. On the bottom of the screen you will have options to choose transactions. You can choose the type of transactions (payments or bills), whether to add this program to all those contacts who have these transactions or to remove this program from those contacts (choose Update to: Yes or No), the dates, the amounts and the categories and subcategories. (Click on Show Subcategories to view the subcategories).
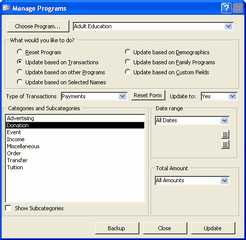
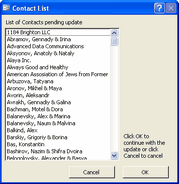
Once you choose your options, click on Update. To choose again, you can click on Reset Form. That will unhighlight anything that was highlighted and bring all the options back to the default. When you click on Update, a warning message will warn you how many contacts will be affected and whether you want to proceed or not. Choose Yes to proceed, No to see a list of contacts who will be affected and Cancel to cancel completely. If you choose No, you can decide to go ahead with the update once you see the list of names by pressing OK.

Based on other Programs:
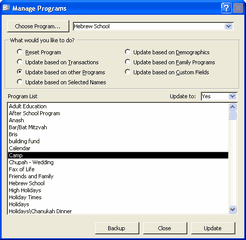
You can update programs based on other programs. For example, you can choose to update all the contacts who are in the camp program to also be in the Hebrew School program. Click the appropriate radio button and choose the program on which to base your update.
Based on Selected Names:
You can update programs based on the names you have previously selected. You can select names in the List View or in the Contact Report.
Based on Demographics:
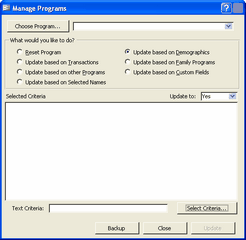
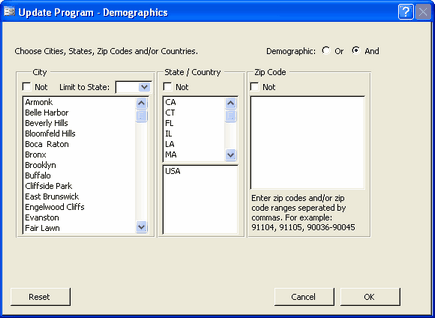
You can update programs based on the addresses of contacts. You can choose city, state, zip code and/or country. Choose Select Criteria and then choose your criteria. You can limit the city list to a specific state by choosing a state from the Limit to State dropdown menu. The cities and states that show up on these lists are built-in and the cities and states that you entered through entering contacts. You can choose a city by clicking on it to highlight it. You can click on as many cities as you want to. Clicking on it again will deselect it. You can choose a state and country from the lists in the same manner. You can limit contacts to a specific zip code or a range of zip codes. You can enter the zip codes separated by commas or with a hyphen in between. For example: say you only want a list of contacts in CA between 91104 and 93465. Clicking on CA and entering 91104-93465 in the Zip Code box will easily accomplish this. Once you select your criteria, click on OK. Your selected criteria will show up in the white box.
Based on Family Programs:
Use this to update a program based on Family Programs. For more information on family programs, see Family Programs under the family tab.
Based on Custom Fields:
Use this to update a program based on your custom fields.