Set up an Email Account
Click the Email Accounts option. Click Add Account and enter your Email account information.
Due to restrictions in Google, we no longer support directly connecting to your Google Account. We strongly recommend that you use Outlook to actually send out your emails which is faster, more secure and robust in sending emails that when sending directly with CMS. Outlook can be setup to work with your Gmail account. The simplest way to set up Outlook is to use G Suite Sync for Microsoft Outlook® The benefits of using Outlook are many:
- Faster: CMS puts the emails in Outook's outbox, and Outlook does the sending. CMS is then free to continue using.
- Secure: With G Suite Sync, your credentials are not stored in Outlook or anywhere else.
- Robust: Outlook handles errors better and the emails can be seen in the Outbox.
To use Outlook, make sure that Outlook is configured already and simply check the "Use Outlook to send email" check box.
If you are not using Outlook, you need to configure CMS with your account information. This option is no longer supported. Passwords are encrypted for your security. If needed, you can create multiple Email Accounts and each Organization (or Letter) can be associated with a different Email Account.
When creating a new Email Account, be sure to click Send Test to send a test email. This will ensure that CMS is able to send email properly using the settings you entered.
These Email Accounts are used just for Sending Email only. Email that is sent through these accounts will show up in your Sent Mail folder. For Outlook, it will work with however you configured Outlook to send email.
Now that you have an Email Account, you can go back to your PDF Settings and select the Email Account.
Sending an Individual Thank-you Letter
On the Transaction tab, select a Payment and click the Letter button.
If you set the Prompt for PS setting (see below for details), you will be prompted to add a PS to this letter.
This will create and send it via email.
The PDF Settings of the Organization in the Payment will be used. If the Letter associated with the Payment has it’s own PDF Settings, it will override the PDF Settings of the Organization.
As a bonus, a link to this PDF file is also saved in your History / Files. In order for this to work, you need to have designated a Correspondence folder. This is done by clicking Program Setup > Options > Letters/Receipts.
Send Thank-you Letter Batches
Click Tasks > Letters / Receipts.
You'll notice that the Email PDF's option is chosen. "Include Primary Email" and "Only Contacts with an Email Address" check boxes are also checked.
The default is to send all letters that have "Not been sent yet."
As with Word Merge and the Built-in letters, we recommend this option (and not to filter by date).
Click OK.
The resulting window will show a list of Payments for which PDFs will be created, and emailed. All are checked. If you want to exclude any of them, you can uncheck to Payment. You can also click Uncheck All and only check off the ones you want.

Each PDF is created based on PDF Settings for the Organization associated with the Payment. If the Letter associated with the payment has its own PDF Settings, it will override the PDF Settings of the Organization.
You can add a custom note (P.S.) to any individual letter by selecting the Payment and clicking the Custom PS button. This should be done after creating the PDFs; clicking Create PDFs after adding the Custom PS will overwrite the customization. You can also preview any of the PDFs by double-clicking the Payment.
Each PDF is emailed to both His and Her email addresses if they exist. A single email is sent and both email addresses are put in the To field. If Him or Her was chosen in the Him/Her field of the Payment, the PDF will sent to only Him or Her as applicable even if both have email addresses.
After the emails are sent, click Close. If there were any Payments that for some reason did not get emailed (they were unchecked, or other error), you will be prompted to remove them from the Batch. We recommend that you do. This way, those Payments will not be marked as Sent."
Detailed PDF Settings
The PDF Settings window click the Section to you need to access the specific settings in that Section.
When viewing any of the Sections, you can be in Letter Mode or Organization Mode. To change to different Modes, use the Mode drop-down.
When in the Letters Mode, you will see a list of available Letters. When in Organization Mode you will see a list of Organizations. Select the Letter or Organization you want to work with.
The actual text of the letter used when generating PDFs are from the Built-in Letters. This applies whether you are configuring PDF Settings for that Letter or not. The Letter you choose when entering a Payment will be the one that will be used for the body of the Letter and the PDF Settings (from the Letter or Organization, as applicable) are used when the PDF is created. The text of the letter can have fields. Fields are special placeholders in the letter that are automatically replaced with data. An example of such a field is <Amount>. When using these fields in a Letter, they need to have the < and > symbols before and after the field name. At the end of this article is a complete list of available fields.
General Section
This section is only applicable for the Letter Mode. When in Organization Mode, this section will be grayed out.
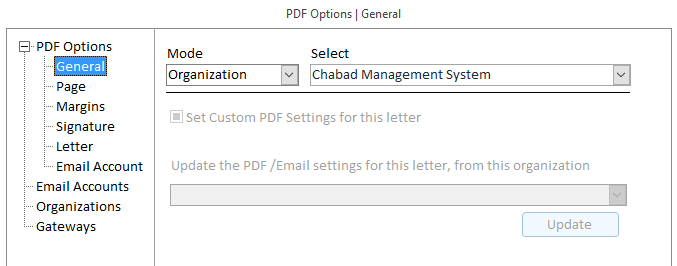
Check the "Set Custom PDF Settings for this letter" check box only if you want this letter to have settings to override the settings of the Organization. If this is unchecked, all the other Sections will be greyed out.
You can get use a copy all the settings from a specific Organization to this Letter. To do this, choose the Organization from the drop-down and click Update. You can then proceed to make specific changes.
Page Section
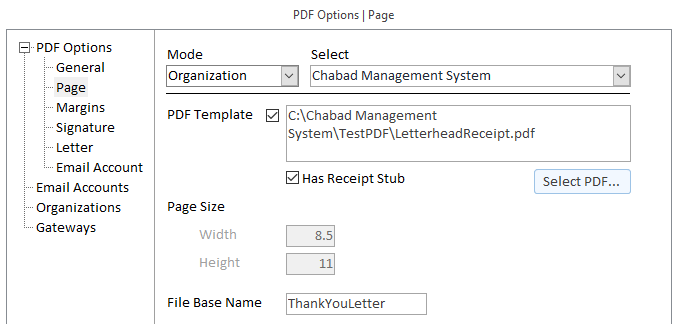
You can create a PDF Template that has your letterhead, logo, names sidebar, footer or watermark. A simple way to create such a PDF is to use Word or Publisher to design your stationery, then save it as a PDF file. When using a PDF template, CMS will copy the design of the template specified and add the specifics for the letter, data and more.
This indicates whether the Template you are using has a Receipt Stub section with Form Fields.
To set up Form Fields, you must have Adobe Acrobat Professional. Fields need to be named according to the standards set by CMS. At the end of this article are a list of support fields that can be used. Simply calling the Field by that name will make it work.
This is only applicable if you're not using a Template. If you are using a Template, the template determines the page size.
This is the beginning of the file name that will be used when saving the PDF. You can use thankyou, receipt, letter, pdf or anything you choose. When the PDF is created and saved, the Base Name will be used followed by the Receipt Number. If there is no receipt number, the TransactionID will be used.
Margins Section
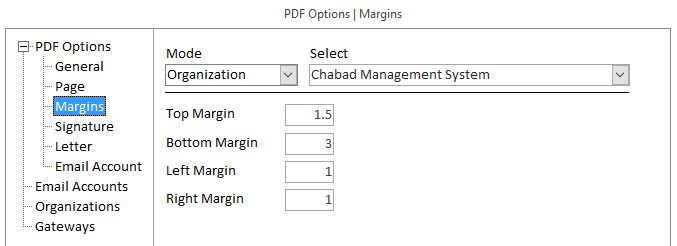
Here you set the margins of the page. If you are using a Template, you should take into account the space consumed by the Letterhead, Names sidebar, footer, and receipt stub.
Margins, as well as other settings are calculated in inches.
Signature Section
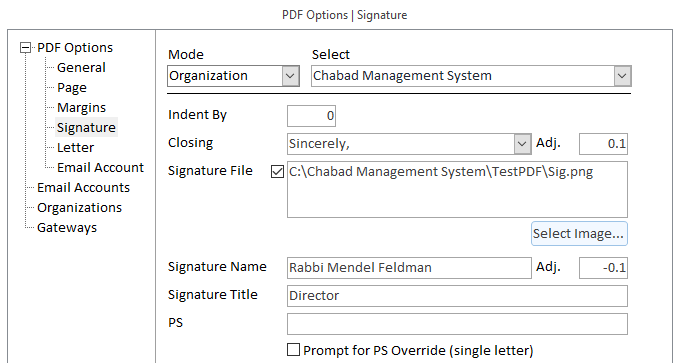
Enter a number, in inches, that the signature section should be indented by. For a modern style, leave this as 0 so that it’s flush left. For a more traditional look, the indent is set to about 1/2 the page. Remember that 0 is not the edge of the page, but rather takes into consideration the left margin. The indent affects the Closing, Signature Image, Signature Name and Signature Title.
Sincerely, Warm regards, Respectfully are examples of the Closing. You must ensure that the Closing is not part of the text of your actual letter.
If you find that you need to increase or decrease the space between the end of your letter and the Closing, add the number here (in inches). In the above screenshot, we added 1/10th of an inch (0.1).
Here you can choose an image file that has your signature. This will be put on the letter after the Closing but before the Signature Name. If you are using a Template for your PDF that has a watermark, you need to use a Signature Image that has a transparent background (not white), otherwise, there will be an ugly white rectangle where the signature image is.
Example Rabbi Leibel Hanoka, Director
If you want to have a PS after the Signature, enter it here. An example would be if you want to mention a new project that is being worked on, or a reminder for an event going on.
Check this option so that whenever you generate an individual letter you should be prompted to personalize it with a PS. The is applicable only when sending an individual letter. (For batch letters, adding a PS is available regardless of this setting. See below.) Note: for PS and PS Override, the letters "P.S." are not automatically included.
Letter Section
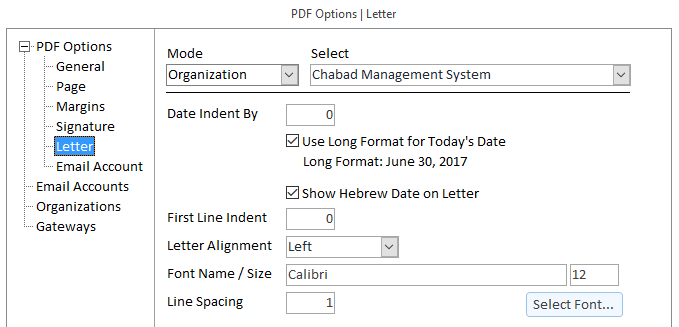
Specify a number (inches) for indenting the Date and Hebrew Date. For a modern look, leave this as 0 so that it’s flush left. For more traditional look, it can be set to about half the page (as with Signature Indent). Typically, if you are not indenting the signature, you would not indent the date.
Show the Hebrew Date on the letter.
Specify a number (inches) for indenting the Address block. This is useful when you have window envelopes where the window is on the right side.
If you want to indent the first line of each paragraph of the letter, enter a number here. For a modern style, leave this ass 0. For a more traditional look, use .5 (1/2 inch).
Left is the most common setting. However, you might find that Justified works for you, where the right edge is not jagged.
While you can choose any font on your computer, it’s best that you stick to a standard font. Calibri works well. Courier New, Times New Roman, Arial are all good choices.
Typically this should be set as 1. However, you may find that you can increase it a bit may look nicer, especially if you are not using a standard font.
Email Account
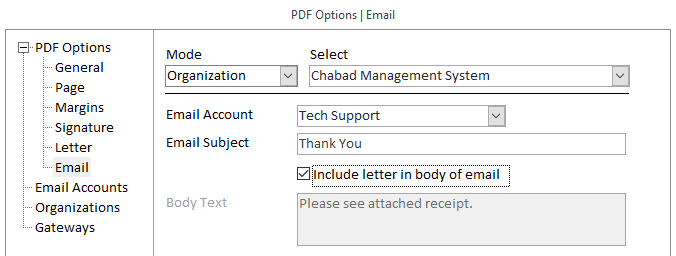
Choose an Email Account from the drop-down. Email Accounts are set up under the Email Accounts section.
Type a subject that the email is to have.
The PDF which is created will be sent as an attachment. This setting determines what the body of the email should contain. Check this box to have the email body include the text of the letter. It won’t have any of the formatting of the PDF (letterhead, signature, margins etc.), just plain text.
If you don't include the letter in the email, you can have the email body include a short note. An example you might want to use for this is:
"Please see attached PDF receipt. Thank you for your support."
List of Fields for the Letter and Receipt Stub.
When in the body of the letter, you need to add <> around the field. Example: <Amount>. When used as a field in the receipt stub, simply name the field to match the name below.
All the fields below will work with the Receipt Stub. For the letter, they are only supported if indicated as Yes.
|
Field Name
|
Letter
|
Notes
|
|
Name
|
No
|
Full name of contact, includes Title.
|
|
CompanyName
|
No
|
|
|
Address
|
No
|
|
|
Address2
|
No
|
|
|
City
|
No
|
|
|
State
|
No
|
|
|
Zip
|
No
|
|
|
Country
|
No
|
Will only show if different than the country you are in, unless you set the “always show country” option.
|
|
NameAddress
|
No
|
This combines the name and address into one field, adding line breaks as needed.
|
|
CityStateZip
|
No
|
This combines the City State and Zip fields, adding a comma after the City.
|
|
Amount
|
Yes
|
Payment Amount
|
|
GoodsAmount
|
Yes
|
The value of the goods the donor received in return for making the donation.
|
|
GoodsDescription
|
Yes
|
The description of the goods the donor received in return of making the donation.
|
|
TaxDeductibleAmount
|
Yes
|
The Amount minus the GoodsAmount
|
|
TextAmount
|
Yes
|
The Amount written in Words. WordAmount also works but not not for the receipt stub.
|
|
HonorMemory
|
Yes
|
Text that was entered in the HonorMemory field. See end of article of an example.
|
|
DonationDate
|
Yes
|
The date the Payment was made. (example: 1/15/2017)
|
|
DonationLongDate
|
Yes
|
The date in “long” format (example: January 15, 2017)
|
|
Method
|
Yes
|
The payment method
|
|
CheckNumber
|
Yes
|
Check number or Last 4 digits of CC number
|
|
ReceiptNumber
|
Yes
|
ReLceipt Number of the payment
|
|
Category
|
Yes
|
Category of the Payment
|
|
Subcategory
|
Yes
|
Subcategory of the Payment
|
|
Purpose
|
No
|
This is the same as Subcategory
|
|
Solicitor
|
Yes
|
Name of the Solicitor for this payment
|
|
Organization
|
Yes
|
The Organization the payment is associated with
|
|
TransactionNote
|
No
|
The note entered in the Transaction
|
|
HebrewDate
|
No
|
Today’s Hebrew date
|
|
TodayDate
|
No
|
Today’s date (e.g. 6/30/2017)
|
|
TodayLongDate
|
No
|
Today’s date in “long” format (e.g. June 30, 2017)
|
For the letter, you can add a space to the beginning of the field. This makes it possible to use the fields in the case where a space only needs to be added if the field is not blank.
An example: Thank you for your donation of <Amount>< HonorMemory>.
This would work whether or not something was entered in the HonorMemory field.
If something was entered for HonorMemry, it would add the space after the amount. Thank you for your donation of $18.00 in memory of your grandfather.
If nothing was entered, the period would follow the amount without a space. Thank you for your donation of $18.00.