The first report is the Contact Report. This report is able to pull up a list of contacts based on the criteria you choose.
The contact report has a few tabs which allow you to specify what information you want to include in the report.
Report Tab
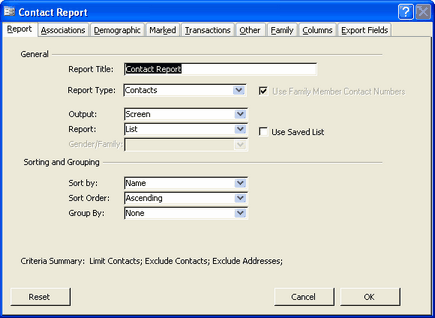
Report Title:
This is what will show up on top of the report when it's viewed on the screen, printed or exported. You can enter whatever text you would like to over here. This is just a way for you to know what report you are printing.
Report Type:
You can choose between Contacts and Family. Choosing Family will display individual family members SEPARATELY as apposed to a contact which consist of husband and wife TOGETHER.
- If you choose Family it will by default only show non-primary family members. To change this, go to the 'Family' tab and check 'Include Primary'.
- If you choose Family you have the option to either Use Family Member Contact Numbers or not. Check the box if you want to include family member contact numbers in the report.
Output:
After choosing the criteria and the report you want to print, you need to decide on the output. Output means whether the report should be viewed on the screen, sent directly to the printer or exported to be used in other programs. I always recommend to first view the report on screen and then print using the print button or the Print command from the File menu. This way, you are verifying that the data you see is what you expected and the criteria is specified properly.
Report:
Here is where you specify what type of report you want to view, print or export.
The choices are:
- List- Shows your contacts in a list form. You choose what contact information (address, phone, fax, e-mail) appears on this report under the Columns Tab. This list is in portrait (long).
- List (Wide)-Same as List except this is displayed and printed in landscape (wide).
- Labels are formatted in Avery 5160, 30 per page.
- Labels Shipping are larger and include your return address Envelopes are standard #10 envelopes.
- Count won't actually display a report. Rather it will give you a message box informing you how many contacts match the criteria you selected.

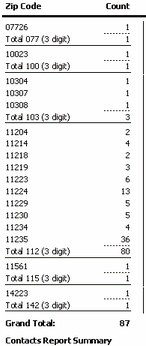
- Zip Code Count will provide a report that will total up the contacts you selected and show only the zip codes with a count for each individual zip code as well as the count for groups of zip codes beginning with the same first three numbers. This is useful for bulk post office mailings with the US Postal Service.
- Contact Details- see Contact Details Report.
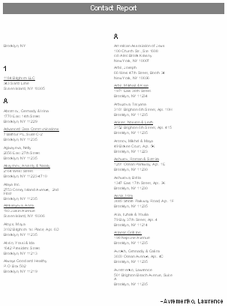
- Directory-This will generate a directory-style report where all the contacts are listed with their addresses in alphabetical order (by last name) with the letter of the alphabet appearing on top of each column.
If you need to view you data in more formats that are not included in the above list, you need to export your data to be used in any program. (see export output)
Gender/Family:
This option is only available if the output is envelopes or labels. This is where you choose whether you want the envelopes/labels to be addressed to Him, Her or Family. This is useful when you are doing gender-specific mailings such as to women only for women programs.
Sorting and Grouping:
This area specifies various sort options.
Sort By:
Here is where you choose the sort order. You can choose between sorting by name, zip code or street.
Sort Order:
You can choose whether the names are sorted Ascending (A-Z and 0-9) or Descending (Z-A and 9-0) based on your sort order.
Group By:
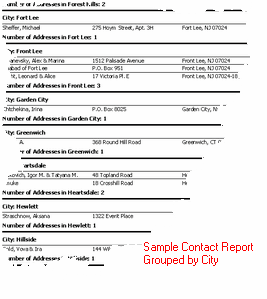
When the contacts are sorted, you can choose to place them in groups. You can choose to group contacts by city, state, zip code, country, program, source, affiliation, status, priority, job or referred. When the report is output, the contacts will appear in groups based on your specifications with a total under each group, totaling the amount of contacts in that group
Associations Tab
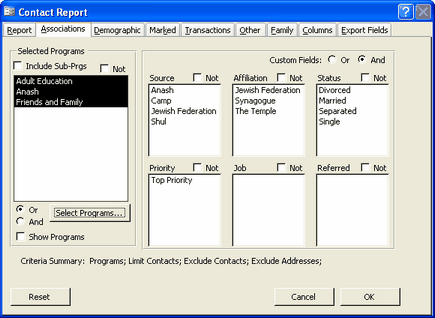
In this tab you can choose to specify contacts that are associated with specific programs as well as the custom fields which you set up.
Programs:
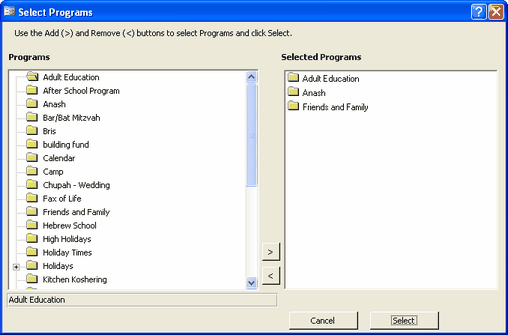
Click on Select Programs to open up another screen where you can select the programs that you want to specify. Use the right arrow to add a program to the selected programs list and the left arrow to remove a program from the selected programs list. When you are done, click on Select.
You can choose to include sub-programs by checking off the Include Sub-Prgs box. You can choose whether you want to include all the contacts in the programs you selected or include all other contacts and exclude those. To exclude the contacts of the selected programs, check off the box Not. This is useful for example when you are doing a mailing to Baalei Batim and want to exclude Anash and Family members so you choose those programs and check off Not. You can choose whether the contacts have to be included in all the programs you choose or only in one. To include them in all programs, click on the radio button And. This means that contacts have to be in each one of the programs you specified. To include contacts that appear in one or more of the programs, click on the radio button Or. This will include contacts that don't necessarily appear in every single program you specified, but appear in at least one.
Note: To include all contacts regardless of the programs they are associated with, do not click on any of the programs. Even if you click on all the programs and choose Or, you would still be limiting the list of contacts to only contacts associated with any of the programs, but you are excluding contacts that are not associated with any program.
Custom Fields:
You can specify contacts that are connected to the custom fields you set up by highlighting those options in the custom fields boxes. Click on any option to select (highlight) it and click again to deselect. The custom fields boxes also have the and/or radio buttons options and the Not checkbox option which works the same way as those buttons in Programs.
Demographic Tab
Here is where you can limit the list of contacts based on their address. You can limit contacts to a city, state, country or zip code.
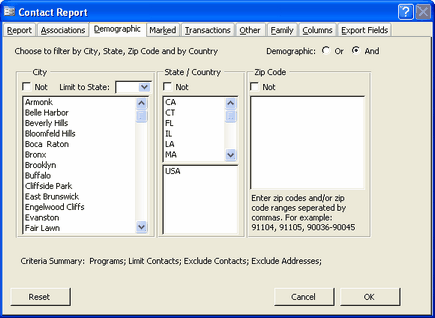
You can limit the city list to a specific state by choosing a state from the Limit to State dropdown menu. The cities and states that show up on these lists are built-in and the cities and states that you entered through entering contacts. You can choose a city by clicking on it to highlight it. You can click on as many cities as you want to. Clicking on it again will deselect it. You can choose a state and country from the lists in the same manner. You can limit contacts to a specific zip code or a range of zip codes. You can enter the zip codes separated by commas or with a hyphen in between. For example: say you only want a list of contacts in CA between 91104 and 93465. Clicking on CA and entering 91104-93465 in the Zip Code box will easily accomplish this.
Marked Tab
This tab is used to limit or exclude contacts with certain markings.
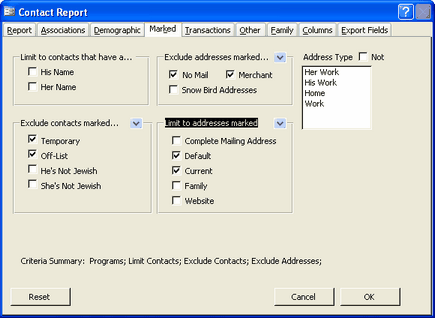
His/Her name:
You can limit the contacts to include only contacts that have a his name or a her name. This is useful when you are doing a gender-specific mailing such as to women only. In that case you would limit to contacts that have a Her Name.
Marked:
You can choose to limit to or exclude contacts marked a certain way. You choose whether to limit to or exclude using the arrow on the right side which will give you a drop-down list with those options. You can exclude or limit to contacts who are marked Temporary, Off-List, He's Not Jewish, She's Not Jewish, No Mail, Merchant, Snow Bird Addresses, Complete Mailing Address, Default, Current, Family or Website.
Address Type:
You can limit contacts that have certain address types and choose to show those specific addresses. The address types are those types which you specify in the custom lists setup.
Transactions Tab
You could limit the list to include only contacts who have contributed a total of a certain amount - in any category - between a range of dates.
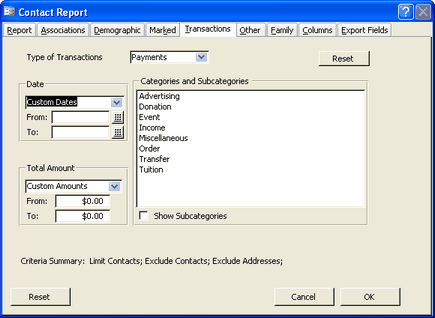
Type of Transactions:
You can choose whether you want to limit the transactions to Payments, Bills or Payments/Bills.
Date:
Here you can choose the dates that you want to limit the transactions to. You can choose from a variety of options in the drop-down menu or you can choose Custom Dates to enter your own. You can also choose All Dates to include all dates in your database.
Total Amount:
Here you can choose the transaction amount from the drop-down menu or you can choose Custom Amounts to enter your own. Alternatively you can choose All Amounts to include all amounts.
Categories and Subcategories:
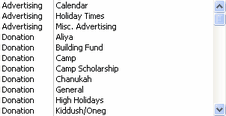
You can choose what categories and subcategories you want to associate the transactions with. Clicking Show Subcategories will bring up all the subcategories on the right with the main category on the left.
Other Tab
In this tab you can choose to limit contacts based on the date added, date changed, name or a saved filter.
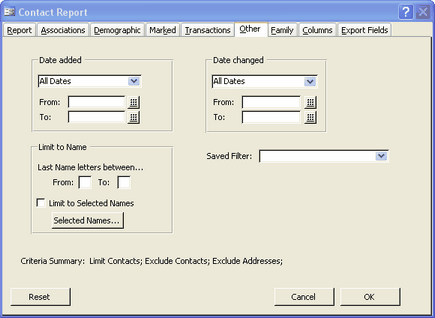
Date Added/Changed:
Here is where you can limit the list of contacts based on when they were added to the system or based on when you made changes to their name (not address).
Limit to Name:
You can choose to limit contacts whose last name begin with a certain letter of the alphabet or fall between a range of letters by entering the letters in the From and To boxes.
Selected Names:
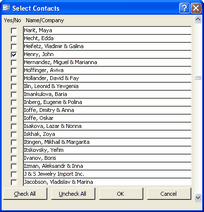
You can also manually select names from a list and limit your report to the selected names. The names are selected in the List View or by clicking on the Selected Names button. Clicking on that button will bring up a list with all your contacts and you can check off the ones you want to limit to.
Saved Filter:
If you previously made a filter and would like to limit the contacts to those that applied to that filter, use the drop-down menu to choose a filter.
Family Tab
Use this tab to limit contacts based on family and family programs.
Programs and Sub Programs:
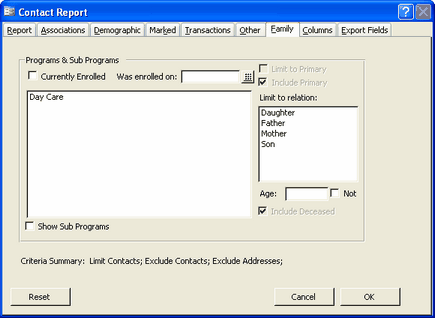
Click any family programs you want to limit the contacts to. You can also choose whether the family member is currently enrolled in the program or a specific date that the member was enrolled by checking the appropriate boxes. Check on Show Sub Programs to bring up a list of all sub programs.
Limit to Relation:
Click on relations that you would like to limit the contacts to. By clicking a relation, you are limiting the report only to those that have that specific family member. (Clicking on Daughter, will show up only those contacts who have a daughter.)
Age:
You can choose to limit the relation to a certain age or to choose the Not checkbox to limit the relations to all besides for that age.
Columns Tab
Here is where you choose whether addresses, phone numbers and other contact information should appear on the report.
Fields to Include:
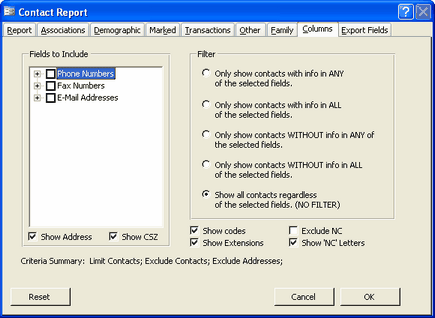
Check off whether to show phone numbers, fax numbers and e-mail addresses. When you check off one of the options, it will expand to show you other options--which phone numbers, fax numbers and e-mail addresses to include.
Show Address:
Check off this box to show the addresses of the contacts selected.
Show CSZ:
Check this box to show the City, State and Zip on the report.
Filter:
You can choose whether to show only contacts with information in any field selected, all fields selected, without information in any one of the fields selected, or without information in all of the selected fields. Or you can choose not to apply any filter. When you decide not to apply any filter, contacts will show regardless if they have information in the selected fields, but those that do have information in the selected fields, those selections will show up.
Show Codes:
CMS codes the types of phone numbers using two-three letter/number combinations. These codes can be customized using the Custom Lists Setup. Check off this option if you would like to show the codes next to each phone number on the report. This is useful if you are listing more than one kind of phone number (such as home and work).

Show Extensions:
Check off this box to show extensions for any phone number that includes extensions. This shows up on the form as an "x" with the extension after the number.
Exclude NC/Show 'NC' Letters:
Check off these boxes to exclude phone numbers marked NC (no contact) or to show the letters 'NC' next to the phone number.
Note: When checking off Exclude NC, this will not exclude contacts who have phone numbers marked NC. Rather it will exclude only the phone numbers.

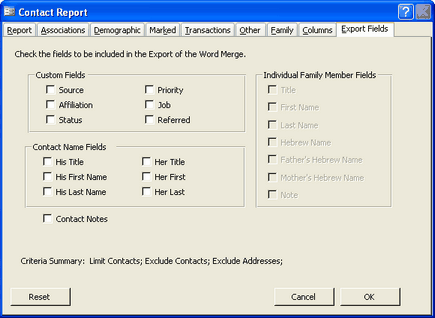
Export Tab
Use this tab to select fields that you would like to be included in a Word Merge or an export.
